
Beginning Quilting Series Part 5
Now for the FUN part! Cutting and sewing your first quilt top.
You have gathered your equipment you have selected your pattern and your fabric and now it’s time to actually start sewing!
Table of contents
Preparing the Pattern
The first thing to do is to read the pattern through completely. A good pattern should have both written instructions and diagrams. I find diagrams help a lot especially if it’s a new technique to me.
Reading the pattern through is a good habit to get into. I can’t tell you how many times I have avoided complications as I have found errors in the pattern before I even began.
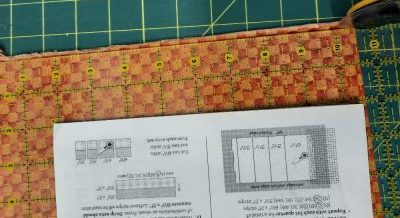
The Yellow Brick Road Pattern that I am using for this project comes with instructions to make several different sizes. Once you have chosen the size you want to make and picked the fabrics make sure to go through the pattern and circle with a pencil (so you can erase the marks later) the numbers in the pattern that pertain to the size you are using.
For example, I am making the lap size quilt which is the second size listed in the pattern. I will now go through my pattern and circle all the sizes that are in the number 2 position. This will help me, so I don’t cut or sew the wrong number of pieces.
Preparing the Fabric
Washing Fabric
To wash or not to wash that is the question.
There is a debate on whether you should wash your quilting fabric before you use it or sew with it as is. There are pros and cons on both sides.
Personally, I wash my fabric. I happen to be allergic to chemicals so washing the fabric beforehand gets rid of any finishing chemicals that may be lingering on the fabric. There are other benefits of this as well. These are
- Pre-shrinks the fabric
- Gets rid of any excess dye (can be a problem in darker coloured batiks)
The cons of pre-washing are that it does wash out any sizing that may be on the fabric. Now, why should this matter, you might be asking? Some people like to work with stiffer fabric especially if they are doing applique work.
A workaround to washing the sizing out is to starch your fabrics after you have washed them. I have done this, but it isn’t always necessary, it really depends on what the fabric is going to be used for.
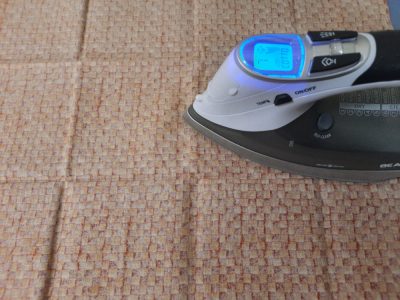
Pressing
Press your fat quarters, or whatever fabric you are going to use before you start cutting it.
This makes it easier to cut the correct sizes as then the fabric is lying nice and flat.
Cutting the Fabric
It is much easier to cut fabric with a sharp blade.
Follow the pattern and cut out the desired pieces that the pattern specifies.
The pattern I am using has specific cutting instructions, but I will admit I don’t like using my mat markings, so I don’t cut my fabric that way so I will be using my method however feel free to follow the pattern instructions if you are more comfortable with that.
Some excellent step by step cutting instructions for an alternative method can be found here.
Sewing the Blocks
Your pieces are cut and now it’s time to start sewing them together!
Seams are sewn together with a ¼ seam. Most newer sewing machines come with a ¼ inch foot, however, if you have an older machine that doesn’t have a specific foot for ¼ inch seams you can mark it on your sewing machine bed. Here is a great video resource on how to do that
Scant ¼ inch what is that?
When you are sewing your seams, you want to be as accurate as possible. This will ensure your blocks are all the same size. Believe me when I tell you this will make it much easier to sew all the blocks together when the time comes.
What does “scant” mean you may well ask? A scant ¼ inch seam is just a thread or two short of exactly ¼ inch. You need to consider the width of the thread you are using as it will take up “space” in that ¼ inch as well.
That is one reason why I recommended Aurifil thread in the Beginner Quilting Supplies post I did earlier. This thread is thinner than a lot of other threads so takes up less “space” when sewing your seams.
Being just a thread-width off may not seem like a big deal at first, but when you add up that thread-width for every seam in your block (or in the entire quilt), it can make a huge difference in the size of your blocks. So, remember to keep it scant!
Chain Piecing
What is Chain Piecing? Chain piecing is a method of sewing together blocks of a quilt one right after another in a long chain, with a continuous stitch, without lifting your pressure foot or cutting the thread. Think of it as assembly line sewing!
I pair my strips up before heading to the machine to ensure I don’t end up with two identical strips side by side. This is where overthinking things can come in. (I am so guilty of this)
Once I have decided which strips I want to go together I take them over to the sewing machine and chain piece them. This makes the sewing go much faster.
One tip when choosing the pieces to sew together, don’t overthink this as I tend to do! As long as the two look good together and our different fabrics it will work out fine.
Laying the Blocks Out
Once the blocks have been sewn together as per the instructions in the pattern. Lay them out on a floor or a bed to audition them.
You want a nice pleasing arrangement with the colours and fabrics spaced as evenly as possible around the quilt. The trick is to have your eye move around the quilt top.
In my case, I don’t want too much black together or too orange together. You want a nice balance or as balanced as possible.
Now it’s time to sew the blocks of the quilt top into rows. To make it easier when it comes time to sew the rows together make sure you do the following:
- Row 1 Press the seams to the right
- Row 2 Press the seams to the left
- Row 3 same as the first row
- Row 4 same as 2nd
Continue until all the rows have been sewn together.
Once rows have been sewn it’s time to sew the rows together. If you have pressed the seams like above all the rows should nest together.
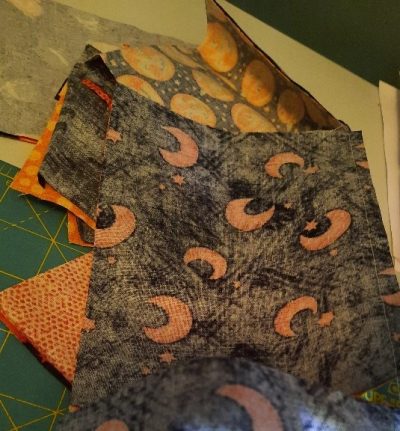
Choosing the Border and Binding Fabric
When the quilt top has been sewn together it’s time to audition for border and binding fabrics.
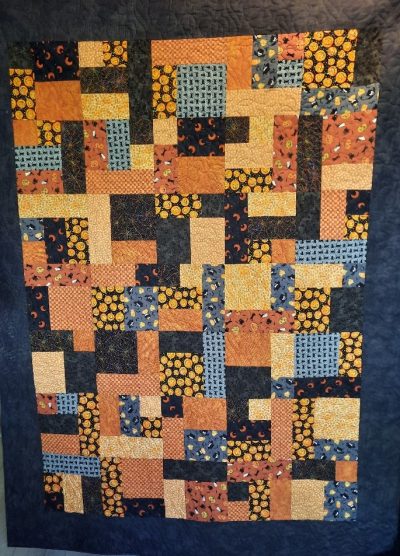
For my Halloween themed quilt, this was easy as the quilt was black and orange. I choose the same black fabric for both.
If the quilt top was in blues and yellows, you may find that a darker blue would look great as the border and binding.
When sewing your borders make sure you measure the top and cut the borders to that length. Don’t just grab a piece of fabric and sew it on. You will find that you will end up with wavy borders if you do that. Borders look much nicer, and you will be much happier with the result if you take the time to measure, cut and pin your borders on.
Quilting the Top
If you have been following along using the Yellow Brick Road pattern, then you will want to quilt the top with an all-over design. You can do that yourself or may decide to take it to a long arm quilter who can work their magic on the top for you.
For mine, I picked an all-over pumpkin design and used black thread.
What’s Next
Well, that’s it for this series! Hope you have enjoyed it! I will go more in-depth in quilting designs, borders and binding in upcoming posts so stay tuned.
0 Comments