
Rain Drops Quilt Pattern and Curved Piecing
So in 2008, yes at least 10 years ago, I purchased a Judy Niemeyer pattern called Rain Drops. They have since redesigned it and it now looks similar to the original pattern but it now has more “raindrops” than the pattern I have. I started gathering the fabrics over the next few years then packaged it up and there it sat for another 4 years. In 2017 I actually started working on it and now it looks like this
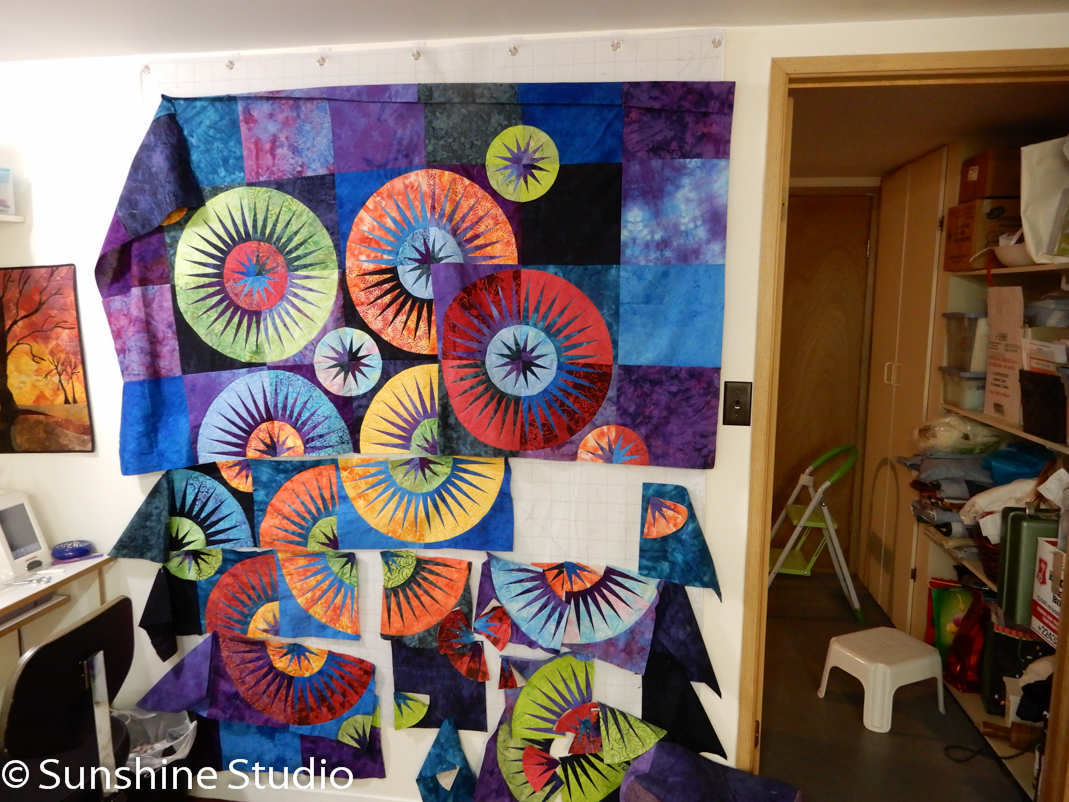
Ok ignore the messy stuff on the right, obviously, I should have closed the door when taking the picture or cropped the picture. Since I am running out of time today you will please just forgive the mess.
So, it still has a ways to go however it is finally coming along! Yeah. I only have about 12 more quilts that are all kitted up to complete. Maybe I will be finished those in another 12 years. Of course, once I have this as a top then I will actually have to quilt it! That is a whole other story.
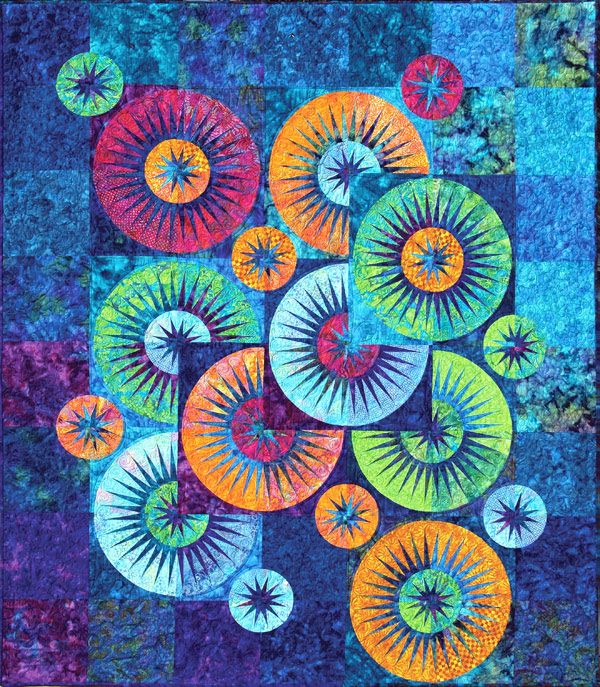
Here is the original picture of Rain Drops that is on the cover of my pattern.
Curved Piecing
So, I have had this quilt on the design wall for a few weeks now and I have had a lot of my clients asking me about how I do the curved piecing. Now I should probably do a video on this and perhaps I will but for now, I thought I would try to explain in pictures.
First, for those of you have ever done garment sewing, doing curved piecing in a quilt is very similar to setting in a sleeve on a dress or top. The larger curves (which I had already sewn before deciding to write about this) are a lot easier to sew in than the smaller ones. With the smaller curves, they are just a little bit deeper so you have to be a little more careful but it is really not hard once you get the hang of it.
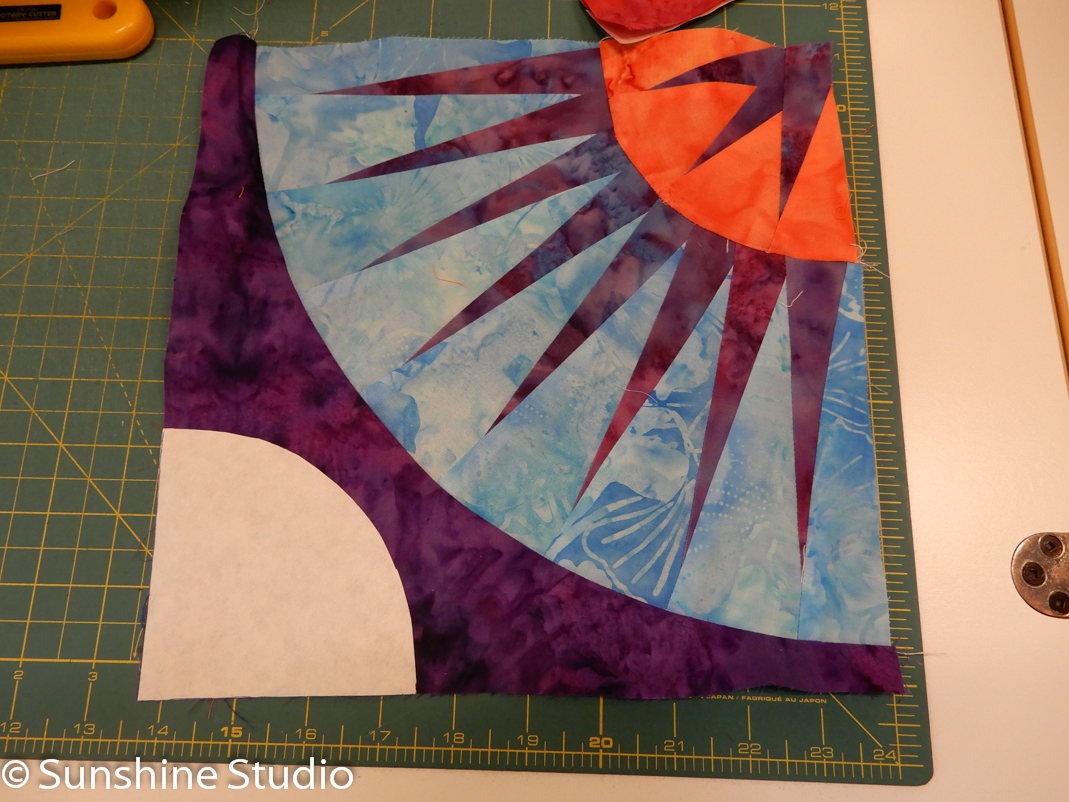
For this design, I had some blocks that required two small star pieces to be added in. I cut out my template from freezer paper and ironed it on the completed block.

From there I freehand cut around the template using my rotary cutter. I guess you could use a ruler to help you if you felt you needed it. I do it this way, I do usually have my left hand (I’m right-handed) holding the area I’m cutting around down for stability, however, it was hard to show that and take the picture at the same time. You just have to be very careful you keep your fingers well out of the way of the blade.
so once it has been cut it will look like this.
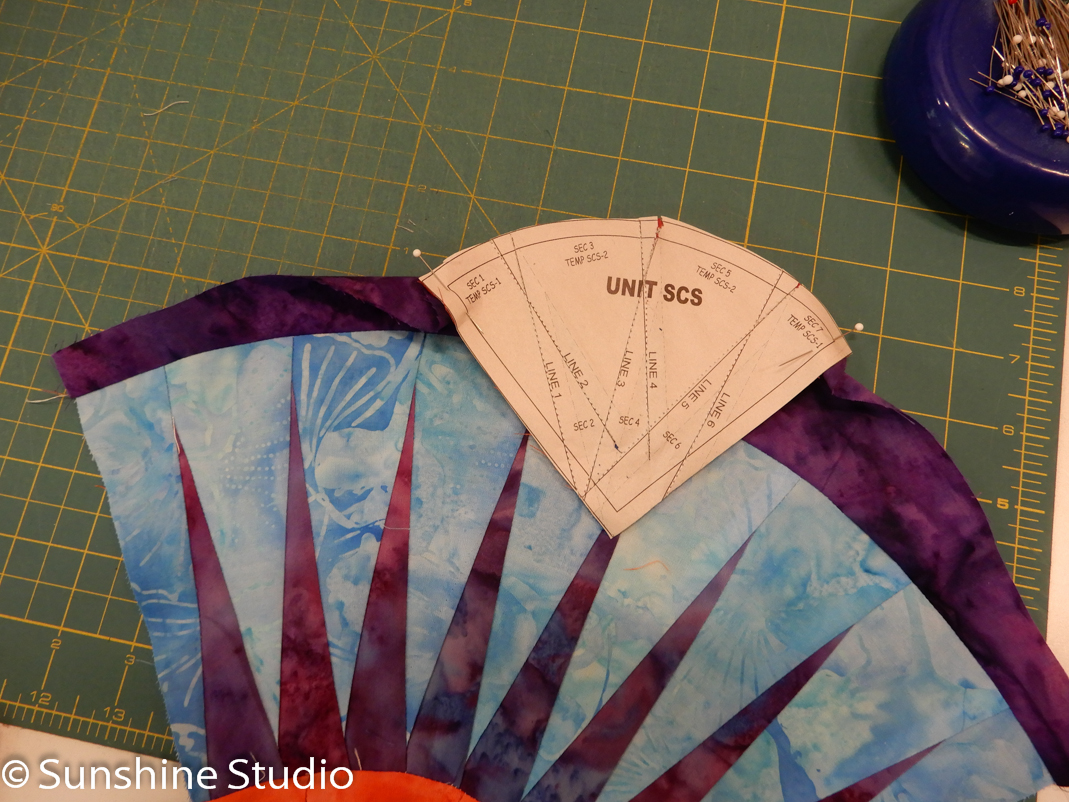
The next thing you do is find the centres of both the block and the star piece you will be piecing into the block. Place a pin at both ends and one in the middle. Now pin around the edge, using as many pins as you need.
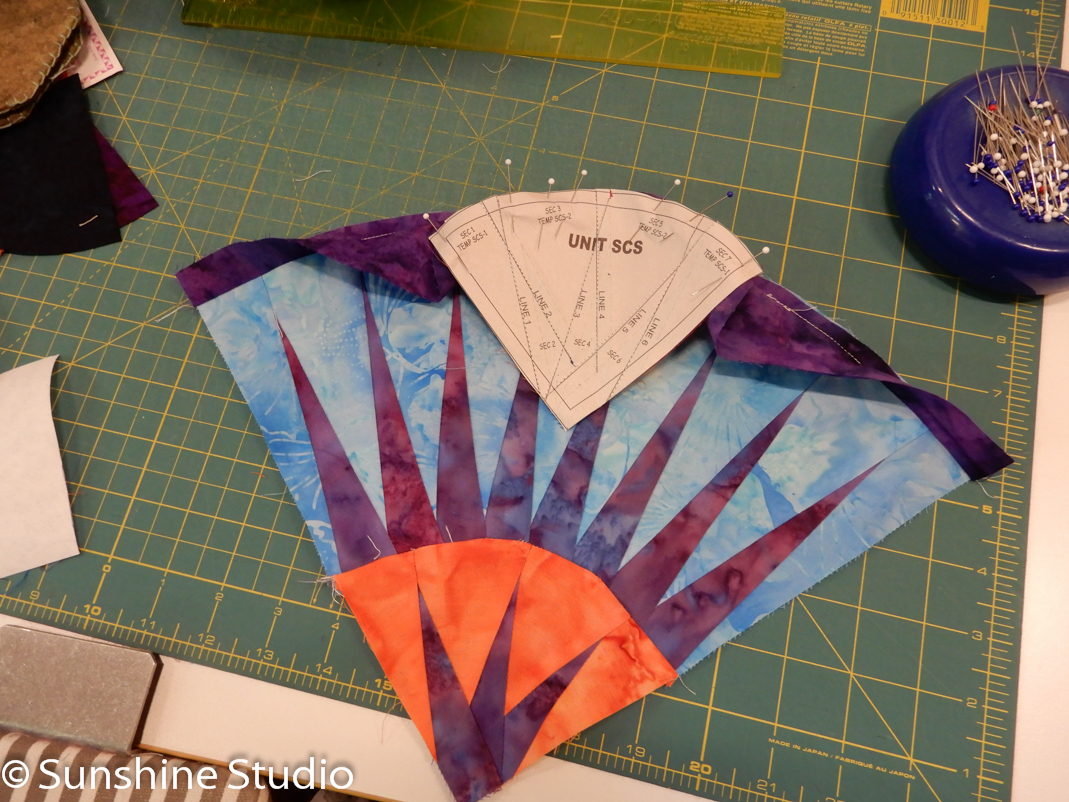
It will now look like this.

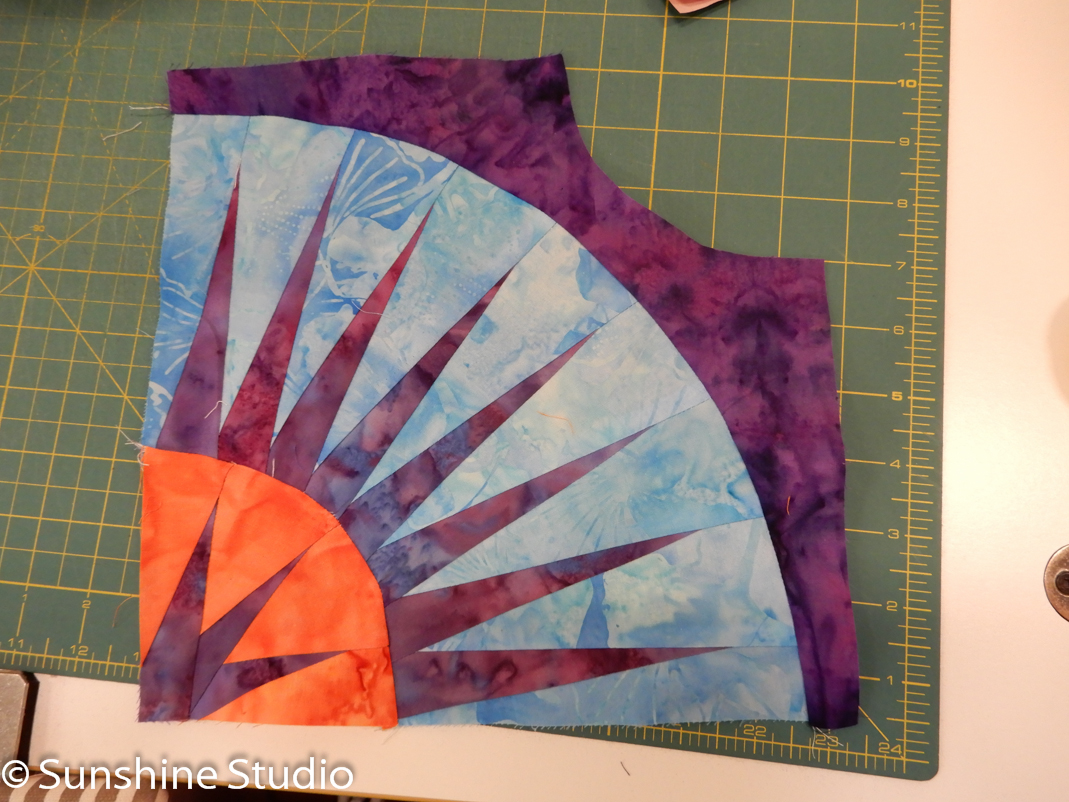
Always sew on the inside of a curve. In this case, it is with the paper facing towards you. It just makes life a lot easier.
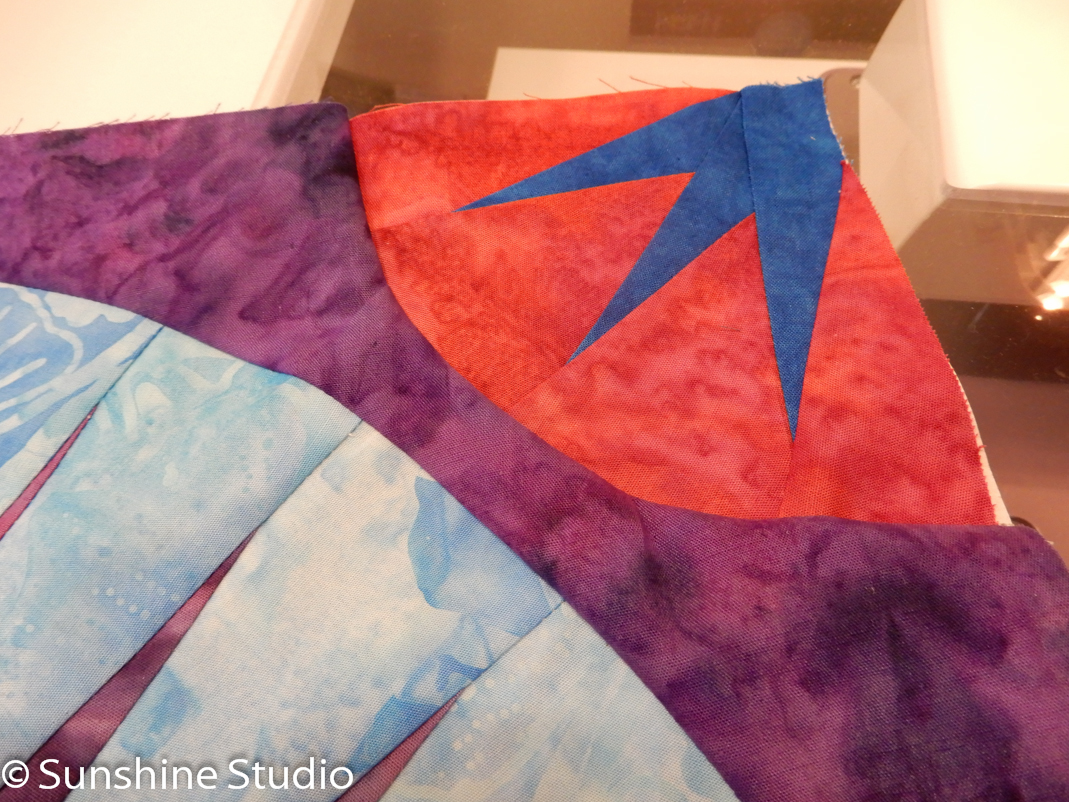
See, curved piecing completed. Now to remove the paper and press the block. Now, I didn’t take pictures of this and maybe that is something for the next post, however, I tend to just press the seams the way they want to lie the flattest. I used to worry about the seams being opposite to one another but I find that as long as you match your adjoining seams up well there really isn’t a lot of bulk at the seams if they are both pressed the same way and in the end, with curved piecing it sometimes actually makes the quilt press flatter if you don’t worry about that. Everyone is different though and I know Judy does have a pressing diagram on the pattern.
So there you have it curved piecing. It is not a quick process but it is not hard either. Maybe give it a try.
Happy Quilting